Zoom bluring on Photoshop
1st Step
1st Step
Start with a photo.

Choose the elliptical marquee tool from the toolbox.
Make a selection on the photo,
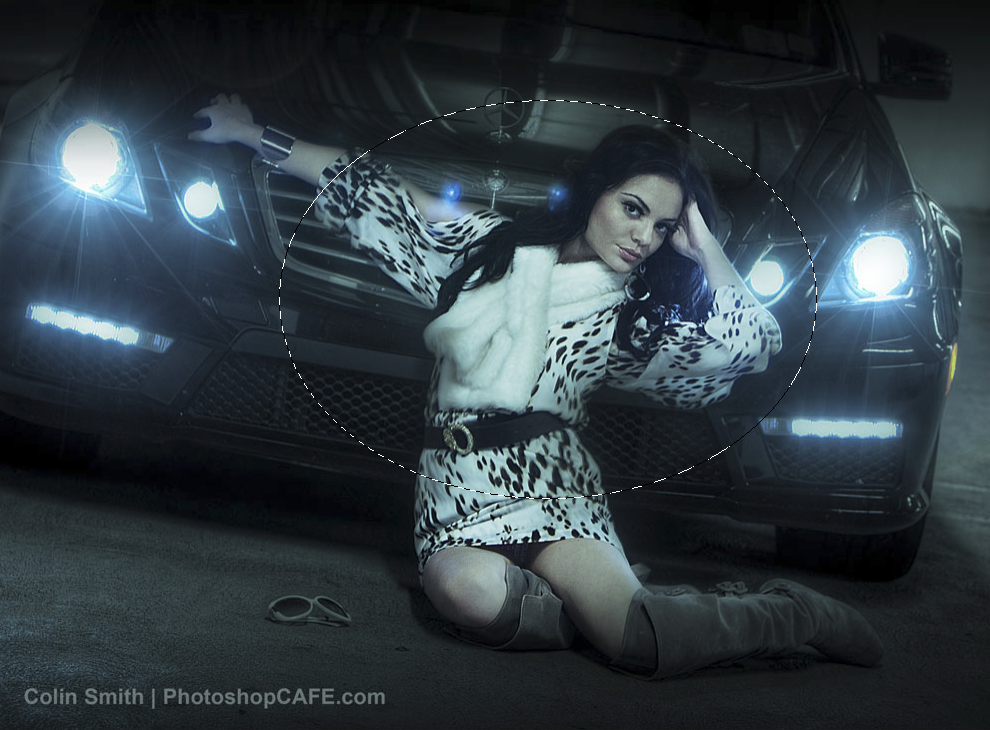
Hold the space bar to re position the selection as you are drawing it.
2nd Step
Now, it’s important to feather the selection. If you don’t the effect will be too harsh and obvious. The feather creates a soft edge and a smooth transition to the blurred areas.
Select>Modify>Feather
(Photoshop CS 3 and CS 4 / before that it was Select>Feather)
(Photoshop CS 3 and CS 4 / before that it was Select>Feather)
Depending on the resolution you will change the size of the feather. This was low res so I used 30.
3rd step
Right now you have a selection around the center of the image. We want to select everything BUT the center.
Choose Select>Inverse or Ctrl-Shift-I (Cmd-Shift-I on Mac)
You should see the selection go around the edge of your page now 4th step
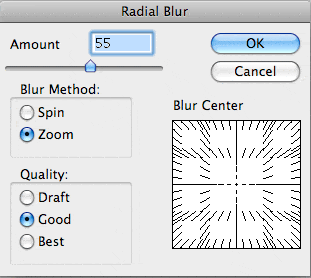 This is where the effect happens.
Choose Filter>Blur>Radial Blur
Choose Zoom as the method
Select Good for quality (Best takes forever with little improvement in quality)
Choose your amount to suit. For a heavier blur use 100. You might have to test it and undo a few times to get exactly what looks best on your image. In this case I used 25.
5th step
And here we have the final result. Changing the feather and the blur amount will change the effect. Experiment with different shaped selections and different amounts of blur. In some cases you may want to apply the blur more than once.

Note to Advanced users: best way to do this is to create a smart object, run a smart filter and then mask the filter, that way the file size doesn't increase and you can use a raw file.
However I wanted to keep it simple for the tut. Also experiment with the Blur Gallery in Photoshop CC to get interesting results.
However I wanted to keep it simple for the tut.
Also experiment with the Blur Gallery in Photoshop CC to get interesting results.
No comments:
Post a Comment